Taking Control Safely: An In-Depth DIY Tree Removal Safety Guide
Are you the type of homeowner who loves taking on DIY projects around your property? Have you noticed a tree on your land that needs to be removed, and you’re thinking about tackling the job yourself? Before grabbing your chainsaw and getting to work, it’s crucial to understand the safety risks involved with DIY tree removal.
In this in-depth safety guide, we’ll walk you through all the necessary steps for safely removing a tree from your property. From assessing whether it’s safe to remove the tree yourself to gathering the right equipment and preparing your work area, we’ll cover everything you need to know.
By following our tips and guidelines, you can feel confident in tackling this project while keeping yourself and those around you safe. So let’s get started!
Assess the Tree and Determine if DIY Removal is Safe
Before deciding whether it’s feasible to tackle the task of tree removal yourself, take a good look at the condition and location of the arboreal obstacle. First, assess the tree’s health and any potential hazards that may come with cutting it down. For example, is the tree leaning towards your house or power lines? Is there damage or rot in the trunk or branches?
If you’re unsure about any of these factors, it may be best to consult with a professional arborist who can provide guidance on how to safely remove the tree. Next, consider your own experience and capability for completing this job. Removing a tree requires physical strength, specialized equipment, and knowledge of proper techniques.
If you don’t feel confident in your ability to handle all aspects of this task safely, it’s better to err on the side of caution and hire a professional. However, if you’ve determined that DIY removal is possible and have made safety your top priority, then gather the necessary equipment for taking down your unwanted flora.
Gather the Necessary Equipment
You’ll need some tools and gear to get started, like a lumberjack gathering his trusty axe before heading into the woods. Here’s what you’ll need:
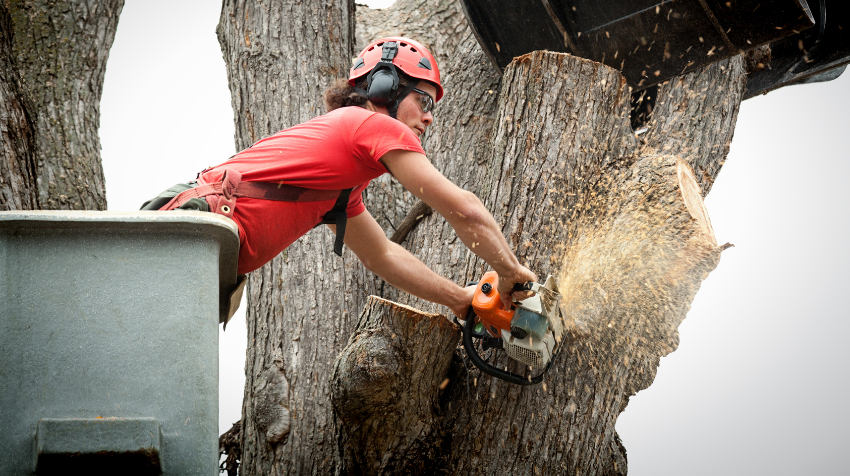
- Chainsaw – A chainsaw is essential for removing branches and cutting the trunk into manageable pieces.
- Safety Gear – Protect yourself with gloves, goggles, ear protection, and a hard hat.
- Ladder – Depending on the height of the tree, you may need a ladder to reach certain parts of the tree.
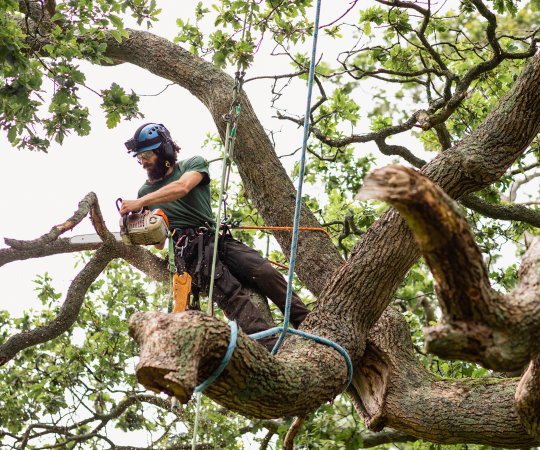
- Rope and Pulleys – These will assist in safely lowering large limbs or sections of the trunk.
It’s important to gather all necessary equipment before starting your DIY tree removal project to ensure that you have everything you need for a safe and successful job.
Once you have all your tools ready, it’s time to prepare the work area by clearing debris and establishing safe zones for felling branches or sections of the tree.
Prepare the Work Area
Before you start the tree removal process, it’s important to prepare the work area. This involves clearing the area of debris and obstacles, securing the tree and surrounding structures, and marking a safe escape route.
To ensure your safety and minimize risks, take these steps seriously and make sure that everything is in order before you begin. By doing so, you’ll be able to proceed with confidence knowing that you’ve taken all necessary precautions.
Clear the Area of Debris and Obstacles
Make sure you’ve cleared away any debris or obstacles from the area where you’ll be cutting down your tree to ensure a safe and unobstructed work space. This includes removing any rocks, branches, plants, or other materials that could get in the way of your equipment or cause tripping hazards. Keep in mind that even small objects can become dangerous projectiles if they’re hit by falling limbs or trunks.
As you clear the area, take note of any structures that may be impacted by the falling tree. Make sure there’s enough clearance for the tree to fall without hitting anything important such as power lines, buildings, vehicles, fences, or landscaping features.
Once you have created a clear and safe work zone around your tree, it’s time to move on to securing both the tree and surrounding structures before making any cuts.
Secure the Tree and Surrounding Structures
Now it’s time for you to ensure the safety of both the tree and surrounding structures by properly securing them before beginning any cutting, so you can feel confident and in control as you tackle this task.
Here are some steps to follow:
- Tie a rope around the trunk of the tree, making sure it’s tight enough to prevent any movement during cutting.
- Check for any nearby power lines or other structures that could be damaged by falling branches or trees, and take measures to protect them.
- Use wedges or braces to support weak or leaning limbs before removing them.
- Clear away any debris from the base of the tree to provide a safe workspace.
By taking these precautions, you can reduce the risk of injury and damage while completing your DIY tree removal project.
Now that you’ve secured your work area, let’s move on to marking a safe escape route in case of emergency.
Mark a Safe Escape Route
As you prepare to cut down the tree, it’s crucial that you mark a safe escape route in case of an emergency. Did you know that falls are one of the leading causes of injury and death in the home, according to the National Safety Council?
Therefore, before making any cuts, take a few moments to carefully consider your surroundings. Look for any potential hazards such as power lines or other trees that may obstruct your path. It’s essential to have at least two escape routes planned out in advance, just in case one becomes blocked during the removal process.
Once you’ve identified your safe escape route(s), mark them clearly with brightly colored tape or flags. This will help ensure that everyone involved in the project is aware of where they need to go if an emergency arises. Remember to also let those around you know about your plan so that they can be prepared as well.
With this precautionary measure taken care of, it’s time to move on to making the cuts and removing the tree safely and efficiently.
Make the Cuts
Now that you’ve prepared the work area, it’s time to make the cuts. To ensure safety and efficiency, it’s important to plan the sequence of cuts beforehand.
Start by making the first cut at the base of the tree using a technique that will allow for safe and precise removal.
As you move onto limbing and topping, be sure to use correct techniques in order to avoid injury or damage to surrounding property.
Plan the Sequence of Cuts
Start planning the order of cuts for taking down a tree, visualizing each step in your mind to ensure a safe and effective removal process.
First, identify the natural lean of the tree and determine the direction you want it to fall. This will dictate where you make your cuts.
Next, plan out any potential obstacles or hazards that could interfere with the falling tree such as power lines or nearby structures. Make sure to mark these areas clearly so everyone involved is aware of their location.
After considering the direction and potential hazards, it’s time to plan your sequence of cuts. Start by making a horizontal cut on the side of the tree facing in your desired direction of fall. This cut should be made at waist height or slightly higher and should extend about 1/3 into the diameter of the trunk.
Then move to make a second cut directly opposite this first one, creating an open notch in which to guide the falling tree. With these initial cuts made, you can then proceed with removing more wood from behind these cuts until there is only small uncut section remaining at the back of your notch.
Now that you’ve planned out your sequence of cuts, it’s time to start taking action with making that first cut at the base of the tree!
Make the First Cut at the Base of the Tree
You’re not a lumberjack, but you can make the first cut at the base of the tree with ease. Feel like a pro as you wield your trusty saw and get ready to bring that tree down! To ensure safety and efficiency, follow these steps:
- Determine which direction you want the tree to fall and clear any obstacles in that path.
- Make a horizontal cut into the trunk on that side, about one-third of the way through.
- Next, make an angled cut downward from above the horizontal cut until it meets it.
Once completed, stand back and let gravity do its job as the tree starts to fall in your planned direction. Remember to always wear protective gear when operating any cutting tool.
Now that your tree is starting to come down, it’s time for limbing and topping. Use the correct technique for this process by following our next set of guidelines.
Use the Correct Technique for Limbing and Topping
Get ready to feel like a pro as you use the correct technique for limbing and topping your tree. This process involves removing branches from the trunk and cutting the top section of the tree.
First, start by removing any small branches that are less than three inches in diameter. Use your chainsaw to cut these branches at an angle, about one-third of the way through, then make another cut from above until it falls away cleanly.
As you move up to larger branches, use a different technique called ‘topping.’ With this method, make a cut on the underside of the branch about 18 inches away from where it connects to the trunk. Then, saw through about two-thirds of the branch from above before making a final cut on the underside to remove it completely.
Remember to always work with gravity and avoid reaching overhead or cutting too close to yourself.
Now that you’ve mastered limbing and topping, it’s time to remove the tree safely without causing damage or injury.
(Note: The subsequent section will cover how to remove a tree.)
Remove the Tree
Now that you’ve made the necessary cuts on your tree, it’s time to remove it.
This involves cutting the tree into manageable sections so that you can safely move them out of the way. To do this, use a chainsaw and make sure to cut at an angle, directing the fall away from anything nearby. Use ropes to control the falling sections and ensure they don’t cause any damage or harm.
Once all sections are down, dispose of the tree properly by either recycling it or hiring a professional service to haul it away for you.
Cut the Tree into Manageable Sections
Like a skilled chef slicing a ripe avocado, smoothly and deliberately cutting the tree into manageable sections requires patience and precision. First, make sure you have all the necessary tools, such as a chainsaw, hand saws, wedges, and protective gear.
Begin by making an initial cut on the underside of the branch or trunk facing away from you. Then, make another cut on the top side of the branch or trunk closer to your body. This will create a notch that will guide where the tree falls.
Next, continue making cuts on each section of the tree until it is completely separated into smaller parts. Remember to always maintain a safe distance from any falling branches or trunks and never work alone. If there are any difficult sections that require additional support while cutting, use wedges to prevent pinching or binding of your saw blade.
With each successful cut made, you are one step closer to safely removing your tree. As you finish cutting your tree into manageable sections, it’s important to consider how you will control their fall when they come down. Use ropes tied securely around each piece to direct its landing spot and avoid causing damage to property or people nearby.
Use Ropes to Control the Falling Sections
Controlling the landing spot of each section is crucial during tree removal, so be sure to use ropes securely tied around them. The ropes will allow you to guide the falling sections in a specific direction, away from any potential hazards like your house or power lines. Additionally, using ropes can help prevent the sections from causing damage to surrounding trees or vegetation.
To effectively use ropes during tree removal, it’s important to understand how they work. Tie one end of the rope around the tree trunk above where you plan to make your cut and secure it tightly with a knot or hitch. Then, run the other end of the rope over a sturdy branch high above the cutting zone and back down to someone on the ground who can control its tension. With this setup, you’ll have more control over where each section falls and reduce your risk of accidents.
Controlling where each section falls is only one part of safe DIY tree removal. Once you’ve felled all parts of the tree successfully, it’s important to dispose of it properly.
Dispose of the Tree Properly
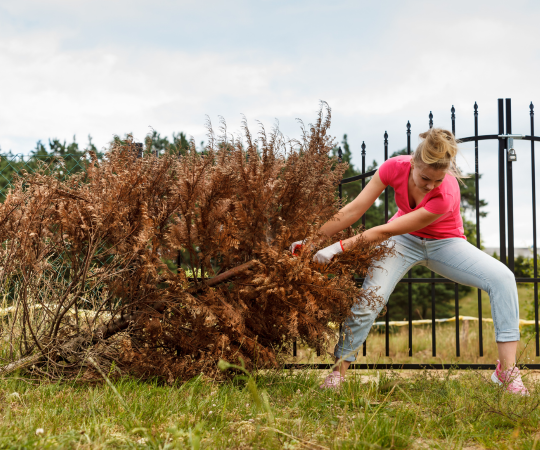
Make sure to properly dispose of the tree once it’s been felled, as neglecting this important step could create unnecessary risks and hazards for you and your neighbors. The first step is to remove all branches and limbs from the trunk, cutting them into manageable pieces that can be easily transported.
Next, cut the trunk into sections that are no longer than six feet in length so they can be safely loaded onto a truck or trailer for transport.
When disposing of the tree, check with your local municipality to find out if they have any specific requirements or guidelines for disposal. Many cities offer curbside pickup for yard waste, while others require you to drop off the tree at a designated location. It’s important to follow these guidelines to ensure that you’re not breaking any laws or putting anyone else at risk.
With proper disposal completed, it’s time to review safety protocols and tips for next time.
Review Safety Protocols and Tips for Next Time
Before attempting future tree removals, it’s crucial to review and implement proper safety protocols. This will not only protect you and your property, but also anyone else in the area.
Make sure you have all necessary tools and equipment, such as hard hats, gloves, eye protection, chainsaws, ropes, and ladders. It’s also important to check the weather forecast beforehand to avoid working during strong winds or storms.
Another safety measure is to always have a buddy nearby who can help you if needed. They can assist with cutting branches or securing ropes while you work on the tree. Additionally, make sure that the area around the tree is clear of people and pets before starting any work.
Always remember to communicate clearly with your partner and establish a plan for emergency situations before beginning any work on the tree. By taking these precautions seriously, you can ensure that your future DIY tree removal projects are completed safely and efficiently.
In conclusion, DIY tree removal can be a risky task if proper safety measures aren’t taken into account. Always prioritize safety by reviewing protocols beforehand and having adequate safety gear available during the job. Having a partner present during the process adds an extra layer of protection in case anything goes wrong. Remembering these tips will allow adventurous homeowners to safely remove trees from their property without risking injury or damage to their home or surrounding areas.
Frequently Asked Questions
How much should I expect to spend on equipment for DIY tree removal?
Looking to take on the challenge of DIY tree removal? One of the biggest factors you’ll need to consider is the cost of equipment.
Depending on the size and location of the tree, you may need a chainsaw, ropes, harnesses, ladders, and possibly even a wood chipper. While purchasing all this equipment can be costly upfront, it’s important to invest in quality tools that will get the job done safely and efficiently.
Consider renting equipment if you only plan on tackling one or two trees. Remember: safety should always come first when it comes to tree removal.
What are some common mistakes that people make during DIY tree removal?
When attempting to remove a tree on your own, it’s important to be aware of the most common mistakes that people make.
One mistake is underestimating the size and weight of the tree, which can lead to improper equipment use and dangerous situations.
Another common mistake is not properly identifying potential hazards such as power lines or nearby buildings.
It’s also crucial to avoid working alone, as having someone else there can provide assistance and help in case of an emergency.
Finally, failing to follow proper safety procedures such as wearing protective gear and securing tools can lead to serious injuries.
By being aware of these common mistakes and taking the necessary precautions, you can ensure a safer DIY tree removal experience.
Can I remove a tree from my property if it’s located near power lines?
If you’re considering removing a tree from your property that’s located near power lines, it’s important to understand the potential risks involved. Electrocuting is one of the leading causes of fatalities in the logging industry, according to OSHA. This means that attempting to remove a tree near power lines without proper training and equipment could put you in serious danger.
It’s always best to consult with a professional arborist or utility company before attempting any tree removal close to power lines. They have the expertise and specialized equipment necessary to safely complete the job while minimizing risk to both people and property.
How do I dispose of the tree once it’s been removed?
Once you’ve successfully removed a tree from your property, it’s important to properly dispose of it.
One option is to take the tree to a local landfill or recycling center that accepts yard waste.
Some areas may also offer curbside pickup for large items like trees, but be sure to check with your municipality for specific guidelines and regulations.
If you have a wood chipper, you can also turn the branches and trunk into mulch for use in your garden.
No matter which method you choose, be sure to follow all safety precautions when handling and transporting the tree debris.
What should I do if I encounter unexpected obstacles while removing the tree?
Encountering unexpected obstacles while removing a tree can be daunting, but don’t worry! You must remain calm and assess the situation.
If the obstacle is small enough, you may be able to remove it with your tools or by cutting around it.
However, if the obstacle is too large or dangerous to remove, don’t hesitate to call in a professional for assistance.
Remember that safety should always come first when removing a tree on your own. So take your time and carefully evaluate any challenges that arise during the process to ensure successful removal without injury or damage to property.
Conclusion
Congratulations! You’ve successfully removed a tree from your property. However, before you pat yourself on the back too much, it’s important to remember that DIY tree removal can be an incredibly dangerous task.
Always assess the tree and determine if removal is safe for you to do on your own. Remember to gather all of the necessary equipment and prepare the work area before making any cuts.
Did you know that according to the National Safety Council, falls are one of the leading causes of unintentional injury and death in homes? This statistic alone highlights just how crucial it is to take safety seriously when removing trees from your property.
By following proper safety protocols and tips, not only can you avoid injury but also ensure that your next DIY project will be completed safely and effectively.
In conclusion, while DIY tree removal may seem like a thrilling adventure for some homeowners, it’s important to prioritize safety above all else. Assessing the tree beforehand, gathering necessary equipment, preparing the work area properly, making clean cuts with precision tools, and reviewing safety protocols are all essential steps in ensuring both a successful outcome and avoiding any potential injuries.
So go ahead – tackle that project with confidence – but always remember to put safety first!
Related Source